![]()
T R A N S C R I P T . . .
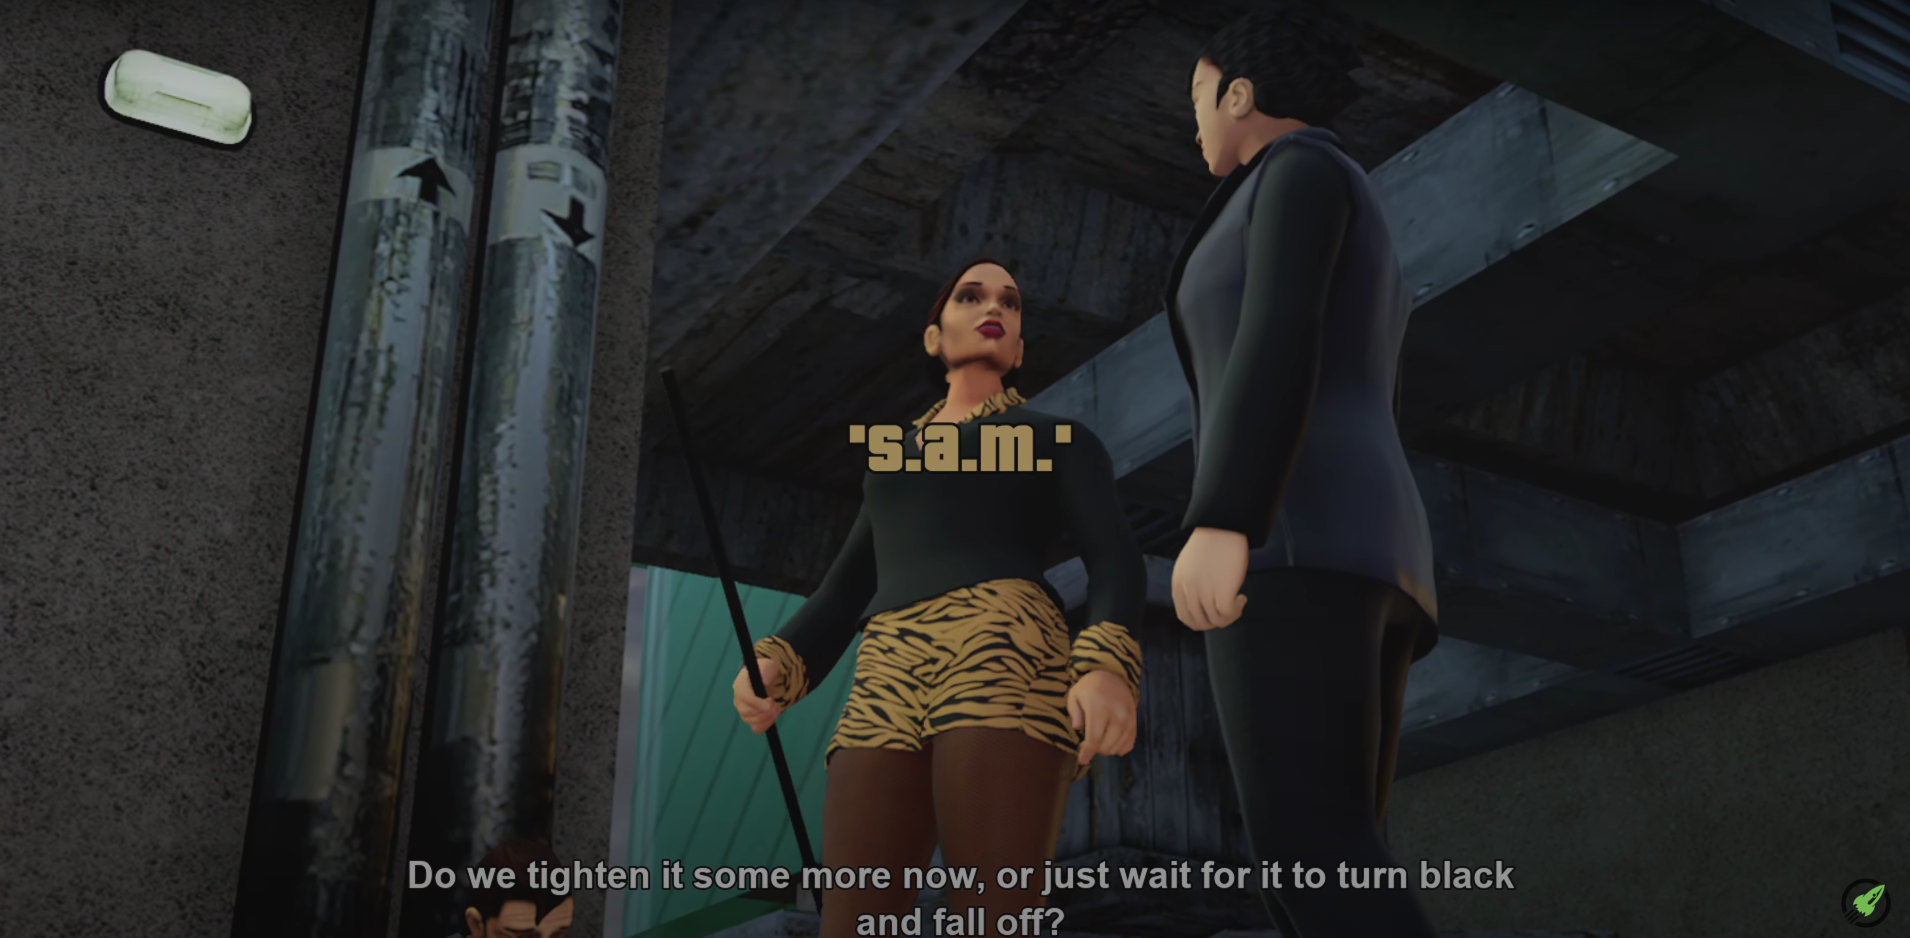
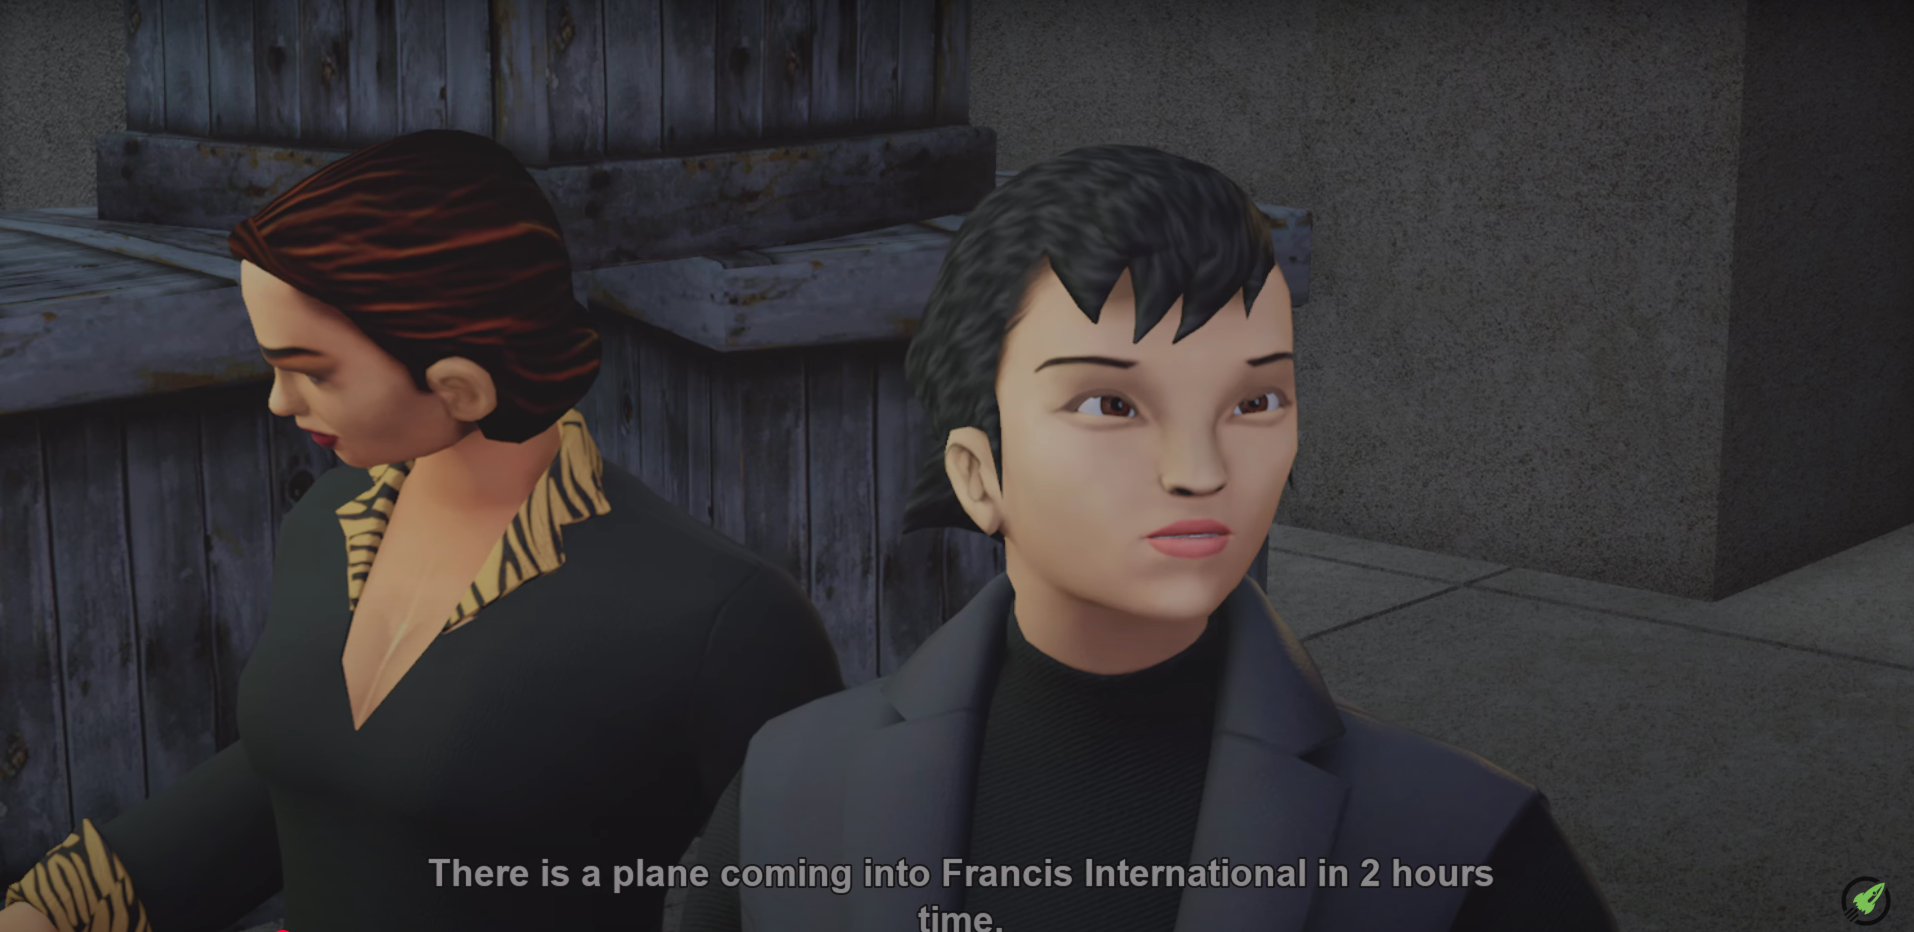
Hello and welcome back to the ninetieth episode of this GTA III The Definitive Edition video game series. So, we’re gonna jump in this Stallion, I mean um, and head over to Fort Staunton Construction Site to go see Asuka Kasen again. This is ‘S.A.M.‘ No worries Maria, It’s good to see you again. Find the boat and get to the marker buoy. So, the acronym S.A.M stands for Surface to Air Missile, if you weren’t aware. Which hints to the type of exercise we’re about to do. From what I remember, this is one of the cooler missions in this particular game.
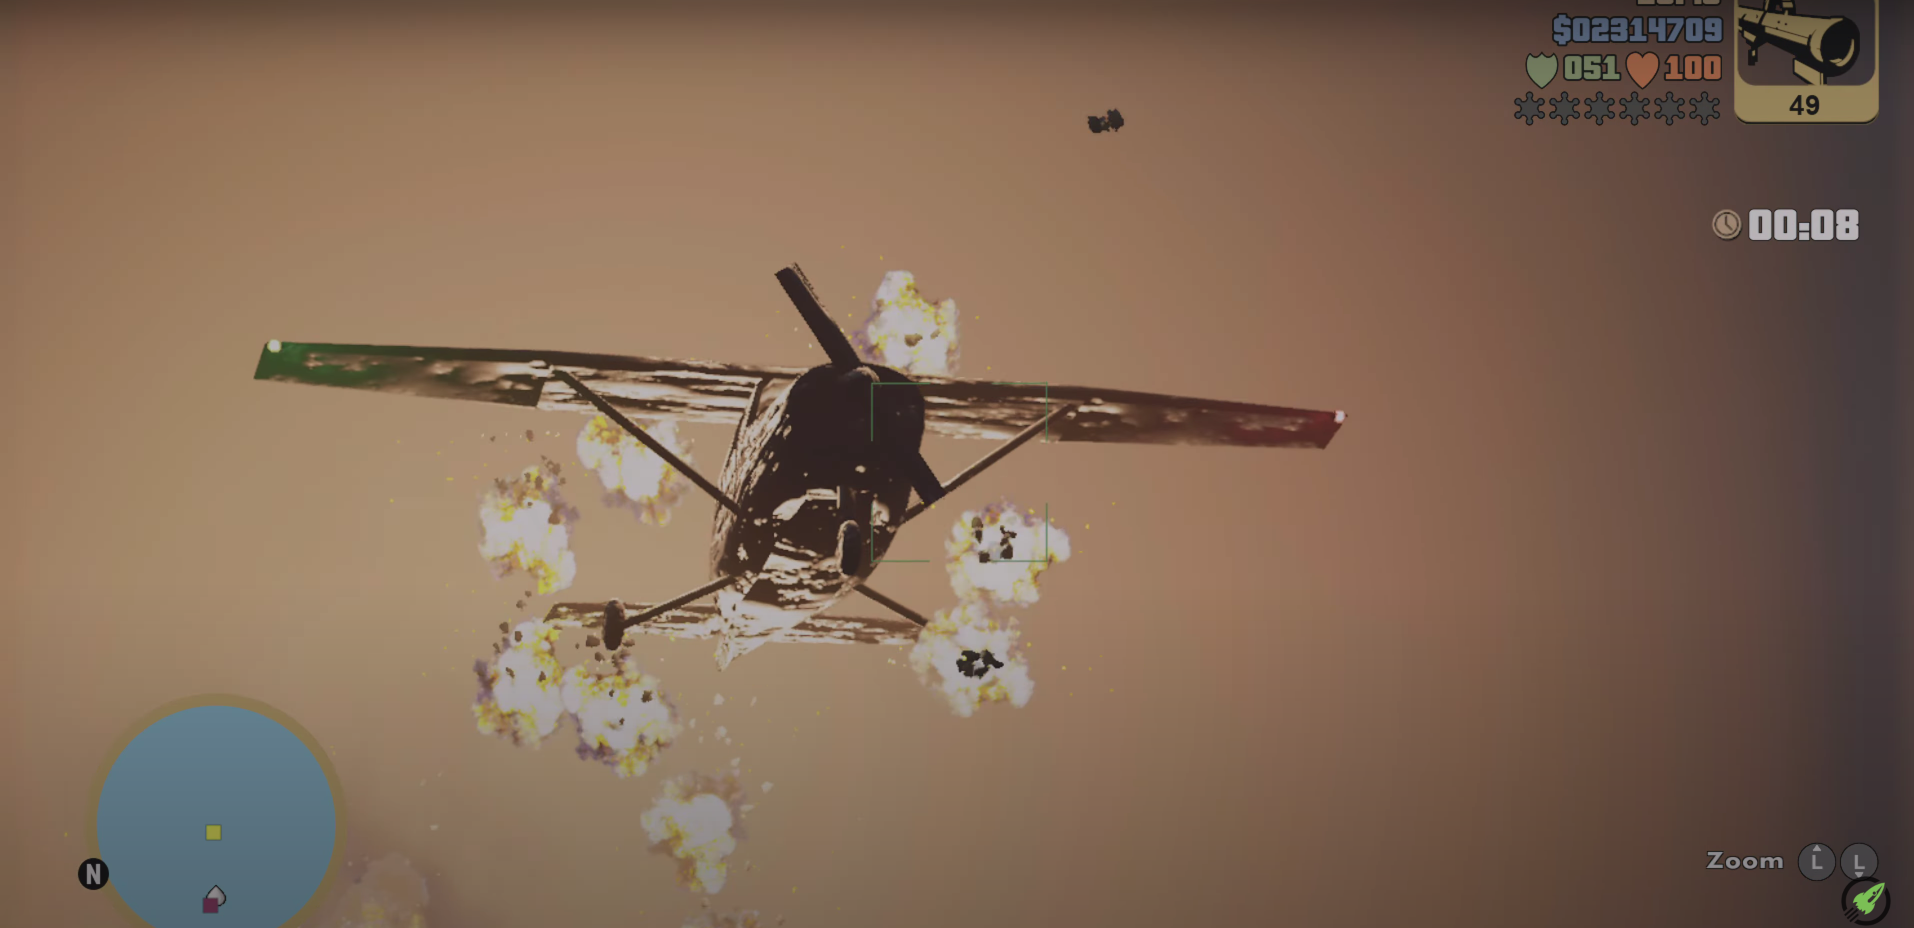
Alright so, we’re at the spot. What do we have here? It looks like a Rocket Launcher. We already got forty-eight rockets, we’ll take fifty-three thank you. Let’s head over to the marker buoy in this Reefer. In the distance there, you can see the plane incoming now. Well, there’s two but, there’s one that’s hooting. That’s the one we’re after. Let’s whip out the Sniper Rifle and have a better look at it. Wait for it to get up a little bit first. Awe, we should be able to see it. Their it is. It is flying! Alright, let’s prepare ourselves. Get the Rocket Launcher out. It should take about three or four rockets.
Not sure how many exactly but, we’ll start firing now. It’s like three or four. And, we got four stars so, let’s hurry up and get the stash cause I can hear a chopper on It’s way. It’s so hard to steer this thing when It’s so slow like this, it doesn’t wanna turn. Yep, that’s crap. Let’s come at it, at a better angle. Had to be right there where the buoy is! There you go. Let’s not go up there. Alright, we got the final package. So, we’ll go back to where we got on this Reefer. Try and avoid these four stars, there’s gonna be Police swarming us by the time we get out here. Let’s get out of here. Oh no, messing around these guys. Oh no the Stallion is, is gone!
Oh my god this is mayhem, Police mayhem. Find the nearest vehicle to hijack. Awe, there we go. Whoa, these cops are on steroids. More like six stars ha. They’re flying. Let’s head back to the Safehouse. Oh, that is so cool. We need to lose these cops before we go back to the Construction Site. Too hairy. Let’s see if we can bribe our way outta this. If not, we’re gonna end the episode. Whoa, give me passage, safe passage. Ah, oh what. Go! Oh my god. That is crazy. There we go. I hope you enjoyed this episode and I’ll see you on the next cause I’m gonna save it right here. Or, end this episode right here.
Summary
GTA III’s mission ‘S.A.M.’ throws players into the strategic use of Surface To Air Missiles, a standout feature in the game. Navigating through Liberty City can be intense, and this mission amps it up with a unique timer, only giving Claude Speed 3 minutes and 28 seconds to complete the task. Understanding how crucial time management is can be the difference between success and failure in this mission.
Asuka Kasen plays a pivotal role in this mission, guiding Claude with a clear objective. Having allies like Asuka reminds players that while Liberty City is full of adversaries, strategic partnerships are vital. The mission’s foundation is laid on her ability to network and extract vital intelligence through Maria and eventually Miguel, setting up the entire operation. This connection is what fuels the mission’s narrative, adding depth to the storyline.
The mission kicks off at the vibrant Fort Staunton Construction Site, a landmark area in Staunton Island. Here, players need to be swift and precise. With such limited time, mentally visualising your route is key—straight from gathering the task’s details to swinging by a set wharf in Staunton Island to grab that crucial Reefer boat. It’s all about planning ahead, ensuring no second goes to waste in this action-packed mission.
S.A.M. ⭐ ASUKA KASEN
Navigating Liberty City: The Path to Victory
In the heat of Liberty City’s chaos, success hinges on precise execution. Start by grabbing the Reefer boat from the dock in Staunton Island—timing here is critical. With the mission clock ticking, navigating Liberty’s waters demands a cool head and sharp reflexes. Ensuring you have a smooth passage to the waters edge of the airport guarantees you’re not losing precious seconds.
The airport’s landing strip is where things heat up. Armed with a Rocket Launcher, you need to land three shots on the incoming plane. Strategy is simple but execution is tricky. Get in position by the ocean buoys, take a deep breath, and aim true. It’s all about timing here—launch those missiles a tad too late, and the mission’s blown.
Expert players know the value of preparation. Before venturing out, check your control settings and ensure that your launcher skills are fine-tuned. Familiarity with the game’s mechanics pays off when you’re under pressure to deliver a hit or miss.
Once the packages drop, the real hustle begins. Pick up the scattered narcotics quickly while keeping an eye on the surroundings. Every second counts, and moving efficiently is your best friend. Plotting the fastest retrieval route minimises delays, helping avoid unwanted engagements with the relentless cops just waiting to pounce.
Handling the Aftermath: Survival in a High-Stakes Environment
Post-mission chaos is where S.A.M. truly tests your nerves. Triggering an immediate 4-wanted stars means Liberty City’s finest are on your tail the moment the narcotics hit your hands. This isn’t just any regular chase—it’s about survival and strategic thinking.
The best advice? Know your escape routes. Before you even cue up the mission, make sure you’re familiar with the quickest paths back to the Construction Site. Dock/wharf familiarity can be a life-saver here. Knowing where to twist and turn to avoid police barricades lets you slip away before you’re overwhelmed.
This mission’s lack of monetary reward is a curve ball. While there’s no immediate payoff, the satisfaction of beating a daunting task adds to the game’s narrative fulfilment. It emphasises the core joy of GTA III Definitive: overcoming challenges and proving one’s prowess in the unruly streets of Liberty City.
Upon completing the SPANK drug collection for Asuka, stashing them safely at the Construction Site ties the mission together. Take a moment here to bask in your success, knowing you’ve navigated one of the tightest missions without a hitch. It’s all about the thrill of the challenge and mastering the game’s complexities.
I reckon the high stakes S.A.M. mission in GTA III is one of those moments where precision and timing are everything. The combination of navigating to the airport, dealing with wanted levels, and taking down the plane mid-flight makes for an intense sequence. It’s also a mission that forces players to plan ahead—getting the right weapons, securing a fast escape route, and preparing for the inevitable police heat.
One interesting aspect is how this mission subtly teaches strategic positioning. Players who instinctively rush in often find themselves overwhelmed, whereas those who anticipate the best sniping spots and escape paths have a much smoother experience. Given that GTA III doesn’t offer mid-mission checkpoints, every mistake is costly, adding to the tension.
It’s fascinating how this mission, like many in GTA III, encourages players to experiment. Some might go for a high-speed getaway, while others might stockpile weapons and take a more methodical approach. Which strategies do players reading on find the most effective here?